Embed an Image into a PDF File
Overview
We have previously discussed the file attachment and field mapping functionalities offered by the PDF Forms Filler for CF7 plugin. Now, let’s delve into a feature that enables you to seamlessly embed images into your PDF file. To illustrate, we will continue using the demo document from the fields mapping tutorial.
There are diverse use cases for image embedding:
- Users may wish to incorporate a personal photo into their PDF when completing the form.
- All pages of the PDF file might require an image such as your company stamp or seal.
- User signatures may need to be added to the PDF (requires an additional plugin).
The Image Embedding Tool offers various methods to embed images into your PDF file:
- Images uploaded by the user as part of the form submission
- Images from URLs provided by the user during form submission
- Images from static URLs that you specify
- Images from dynamic URLs generated using mail-tags
Embed a User Uploaded Image File
You will need to create a file tag in your CF7 form with which the user can upload their image. The tag can be created with the file button in the CF7 form tab’s toolbar.
Access the PDF Form form-tag generator thickbox, scroll down to the Image Embedding Tool, select the file field from the CF7 field/mail-tags dropdown, select the PDF file and page that you want to embed the image into and click the Embed Image button.
Adjust the bounding box where the image will be located on the page.
Let’s see an example:
-
In our previously created form (as shown in the CF7 Form with Mapped Fields image in the mapping fields documentation) we added the
[file image-embedding]tag. This creates an upload form field on the front-end (visible in the CF7 Form Frontend Preview). -
Let’s use the
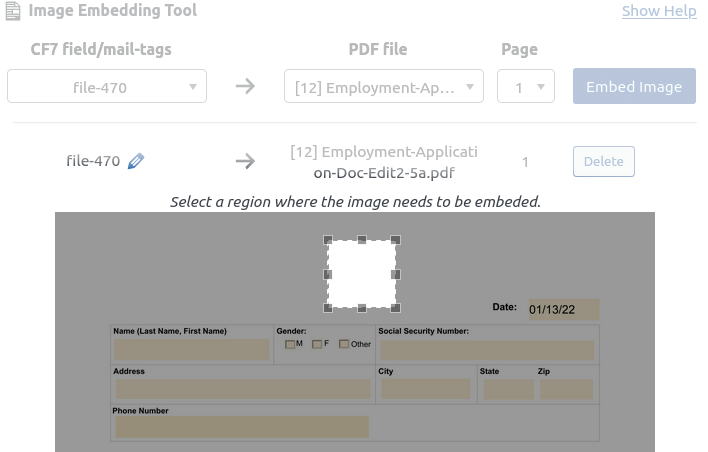
CF7 field/mail-tagsdropdown in theImage Embedding Toolto select the newly createdimage-embeddingfield. We need to select the PDF file in thePDF filedropdown and1in thePagedropdown.Image Embedding Tool Interface

We are going to click the
Embed Imagebutton and go to the next step. -
We now need to choose the area where the image will be embedded in the PDF file. We are going to adjust the bounding box to where the image should appear. We can change the boundaries with the cursor or using the numeric input boxes that appear below the page screenshot.
Adjusting Image Bounding Box
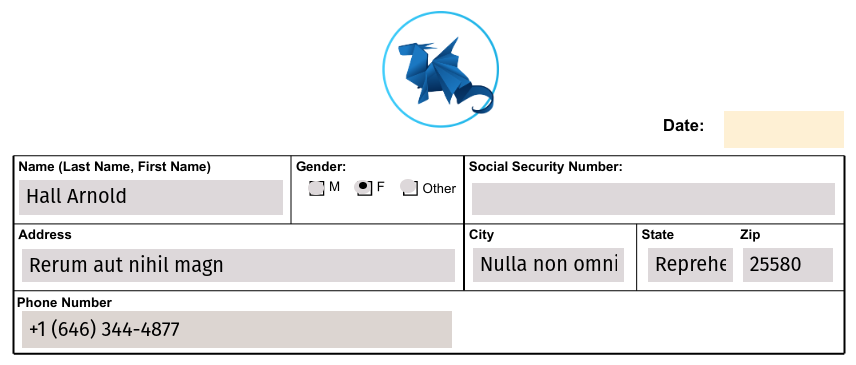
Once all the settings are adjusted, we need to save the CF7 form by clicking the
Return to Formbutton and theSavebutton. Now when our user fills in and submits our contact form, an email will be sent with a PDF that contains user’s uploaded image in the location where we put our bounding box.PDF with Embedded User Image
Embed an Image from a User-provided URL
The URL form-tag can be used in the same way as the file form-tag. The user can then enter the URL of the image instead of uploading the file from their device.
You can also use third party CF7 add-on plugins that provide form-tags which return a URL to an image, such as the Contact Form 7 Signature Addon.
Embed an Image from a Static or Dynamic URL
You can specify a custom URL or a collection of mail-tags as a URL as the source of the image to be embedded.
If we select Custom text string... in the CF7 field/mail-tags dropdown and click the Embed Image button, we will be able to enter any string URL. For example, we can enter a URL to the plugin icon: https://raw.githubusercontent.com/maximum-software/pdf-forms-for-contact-form-7/master/assets/icon.svg.
Custom URL for Image Embedding

Similarly, instead of linking to a static image, you can use a URL to a dynamically generated image, such as a QR Code: https://api.qrserver.com/v1/create-qr-code/?data=example
Other useful information can be transmitted in the URL using special mail-tags: https://api.qrserver.com/v1/create-qr-code/?data=[_site_url]
You can find more information about special mail-tags in Contact Form 7 Docs.